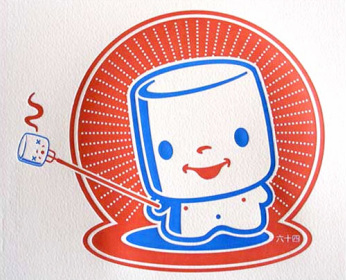
I'd like to start out this post by introducing you to one of my friends. This is Marshall Marshmallow. I think he is the cutest little thing. You can buy bags, pouches, and zipper pulls with him on it. The sad thing is, it appear that he eats his little marshmallow friends. Maybe he'd like to make some marshmallows to eat.
Would you? I can tell you how.
I found this recipe on Martha Stewart's website and decided to give it a try.
....but I made a few minor modifications.
1) I used coconut flavoring instead of mint.
2) I made them pink. Because it's more fun.
Here's how!
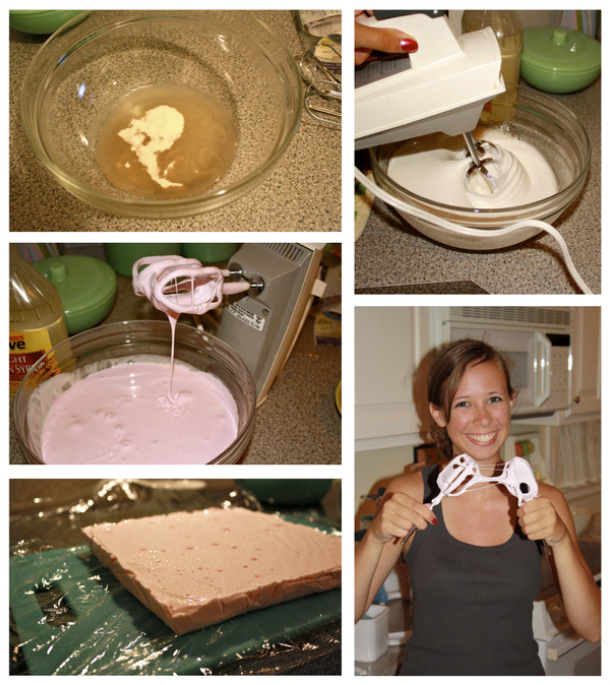
1) The first thing to do is let the gelatin sit. While it's sitting, boil together your Karo, Sugar, and a little water (see recipe at the end of this post for details)
2) Then, pour the hot mixture over the now rock-hard gelatin water. You should probably not use a hand mixer like I did. It's just not easy. Use a whisk attachment on your fancy Kitchen Aid. As you can see, the mix is simply too thick to use a small mixer. Plus, you will have to hold it in your left hand whilst taking a photo with your right.
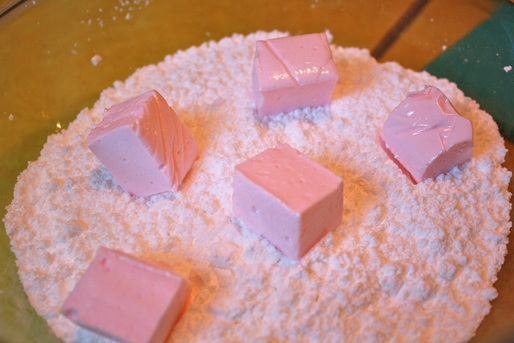
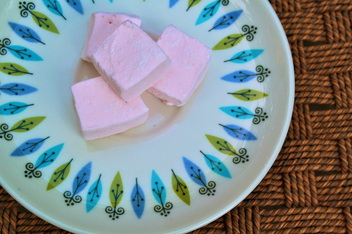
3) Make it PINK!
4) Pour it into a 9X9 pan lined with cooking-sprayed cling-wrap.
5) Let sit overnight.
6) Wake up for work extra early so you can cut the block into squares and roll in powdered sugar before a crazy day of two year olds.
7) enjoy!!!
Would you? I can tell you how.
I found this recipe on Martha Stewart's website and decided to give it a try.
....but I made a few minor modifications.
1) I used coconut flavoring instead of mint.
2) I made them pink. Because it's more fun.
Here's how!
1) The first thing to do is let the gelatin sit. While it's sitting, boil together your Karo, Sugar, and a little water (see recipe at the end of this post for details)
2) Then, pour the hot mixture over the now rock-hard gelatin water. You should probably not use a hand mixer like I did. It's just not easy. Use a whisk attachment on your fancy Kitchen Aid. As you can see, the mix is simply too thick to use a small mixer. Plus, you will have to hold it in your left hand whilst taking a photo with your right.
3) Make it PINK!
4) Pour it into a 9X9 pan lined with cooking-sprayed cling-wrap.
5) Let sit overnight.
6) Wake up for work extra early so you can cut the block into squares and roll in powdered sugar before a crazy day of two year olds.
7) enjoy!!!
Ingredients
Nonstick cooking spray
3 (1/4-ounce) packages unflavored gelatin
1/2 cup cold water
2 cups granulated sugar
2/3 cup light corn syrup
1/4 teaspoon coarse salt
1/4 teaspoon pure peppermint extract
Confectioners' sugar, sifted, for coating
Directions
1. Lightly spray a 9-by-9-inch baking pan with cooking spray. Line pan with plastic wrap, leaving a 2-inch overhang on all sides; set aside.
2. In the bowl of an electric mixer fitted with the whisk attachment, sprinkle gelatin over 1/2 cup cold water; let stand for 10 minutes. In a medium saucepan, combine sugar, corn syrup, and 1/4 cup water. Place saucepan over medium-high heat and bring to a boil; boil rapidly for 1 minute. Remove from heat, and, with the mixer on high, slowly pour the boiling syrup down the side of the mixer bowl into gelatin mixture. Add salt and continue mixing for 12 minutes.
3. Add peppermint extract and mix until well combined. Spray a rubber spatula or your hands with cooking spray. Spread gelatin mixture evenly into pan using prepared spatula or your hands. Spray a sheet of plastic wrap with cooking spray and place, spray side down, on top of marshmallows. Let stand for 2 hours.
4. Carefully remove marshmallows from pan. Remove all plastic wrap and discard. Cut marshmallows into 2-inch squares using a sprayed a sharp knife. Place confectioners' sugar in a large bowl. Working in batches, add marshmallows to bowl and toss to coat. Marshmallows can be stored in an airtight container up to 3 days.