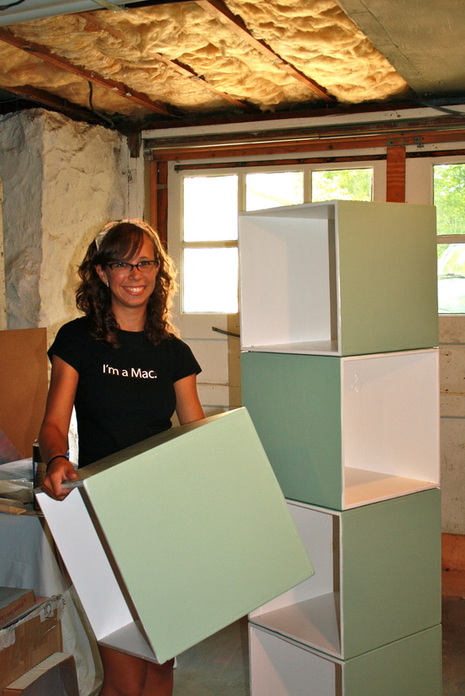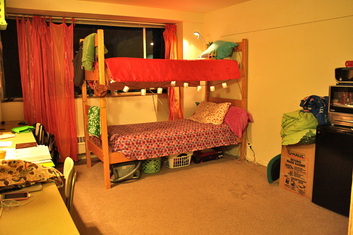
Recently, my roomie RaeLea and I have been shopping around for some sort of shelving unit for our dorm. With limited space and difficult room dimensions, it is much easier to leave our beds bunked for optimum use of floor space. This last year I had the top bunk and did not mind nearly as much as I thought I would, and she didn't mind the bottom. The problem is, we need a sort of night stand by the bed for our glasses, retainers, alarm clocks, and late-night study material (oh, and emergency flashlights for those multiple times we forget that you can't use the microwave and the hair drier at the same time. POW!). Last year we installed some simple and very small shelves by each bunk, and while they were very un-intrusive, they were also almost completely useless. Plus, let's face it, you aren't really supposed to be nailing all kinds of things into those walls. So it's time for a solution. Behold, the PowerTower (note: this is my dad's name for it). I would rather call it Cute Cubes. whatever. Anyway, after some discussion and shopping around for shelves, cubes, and such, we decided it would be best to construct our own. Upon looking around online I see that one sturdy wood cube is anywhere from $15-$30. Um, no thanks. Turns out that the one piece of plywood that we needed was less than one cube. Sunday project? I think yes!

Step 1: Gather Your Supplies.
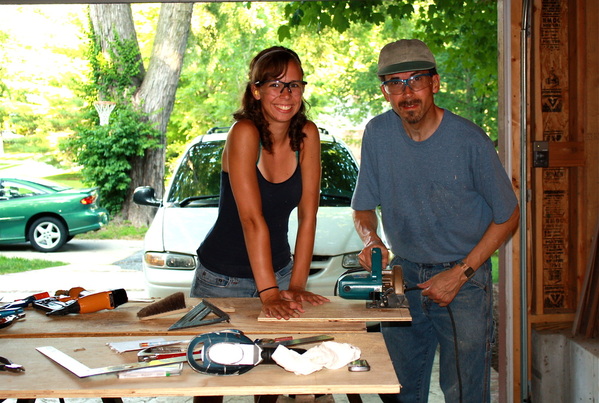
Pose for a photo. Advertise for Liquid Nails.
We made a Home Depot stop this morning for our plywood and Liquid Nails (my dad's favorite binding material EVER) before getting started. Home Depot will even cut your wood into the dimensions you want, even lots and lots of 16" squares.
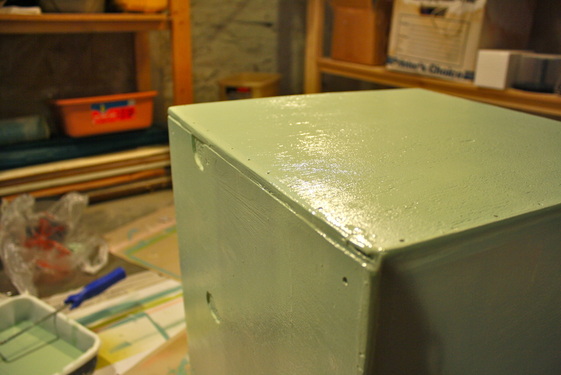
We also got some little felt pads to go between the cubes to avoid sticking once they are painted. I am thinking white on the inside and maybe a blue on the outside? Not sure yet.
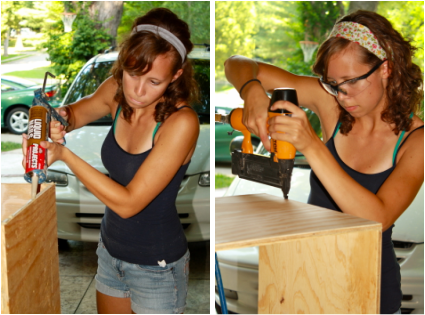
Step 2 and 3: Glue+Nails+Gun
Since our squares were cut at the store, all we had to do was jump right in with the glue and nail gun. Not sure why I have a different headband thing going on here-- I guess one photo was pre-pool. Oh, that's another step. Stop halfway through and take a dip in the local pool. You'll need it!
Anyway, these cubes aren't going anywhere with the amount of goo and nails we crammed in.
Oh, and the safety goggles are compliments of my dad, Mr. Safety. Of course.
Step 4: After making all five cubes with four sides, cut the last pieces for the backs of all cubes, glue, nail, repeat. Success!
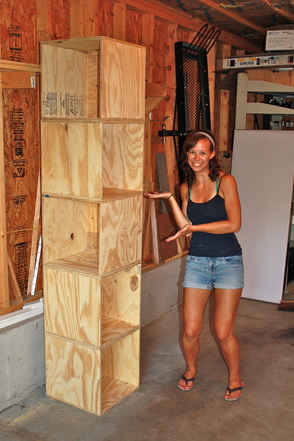
Ta-da! done at last. Stay tuned for the next steps including sanding, drilling (for cube attachment hardware), priming, and painting. Should be a fun project to get finished!
Working on projects like this makes me think of all the handymen (and women) who have taught me so much about fixing, building, and restoring. The first to come to mind is, of course, my dad, who has been fixing and building things his whole life and has taught me everything I know. My mom also has a certain amount of fix-it in her, always restoring old furniture and finding her own quick solutions. One person she gets this from is her dad. Both of my grandfathers are quite the handymen. My grandpa
Clyde is always finding some old cottage or cabin to completely remake, often gutting the whole place and starting over from floor to ceiling. My grandpa Dode is also good at making the old look new again, and was always building swings and tree dwellings for his lucky grandkids. I have also had time around various uncles who have each perfected an area of expertise from tile work to restoring stereo receivers. Aside from family, my high school science teacher took time to teach our senior Physics class of four students (AKA the Nerd Herd) how to use power tools to build a trebuchet, or a slingshot that uses a physics formula to aim very precisely. My boyfriend Mikey and good friend Nate have taught me that anything is fixable with a little (or a lot) duct tape and enough patience. Thank you to all those who have taught me so much about fixing and building!